| MacHouse Software |
Last updated: March 19, 2011
|
| ExportW2Q - User's Guide |
1. Installing and uninstalling ExportW2Q Please read the README file that comes with the application. Or click here to download one. Click here to download license notices.
What is ExportW2Q? ExportW2Q lets you convert Window Media Video movies into QuickTime movies. All you have to do is configure export settings and then drag and drop a WMV movie onto the drop box. And ExportW2Q will start converting movies immediately.
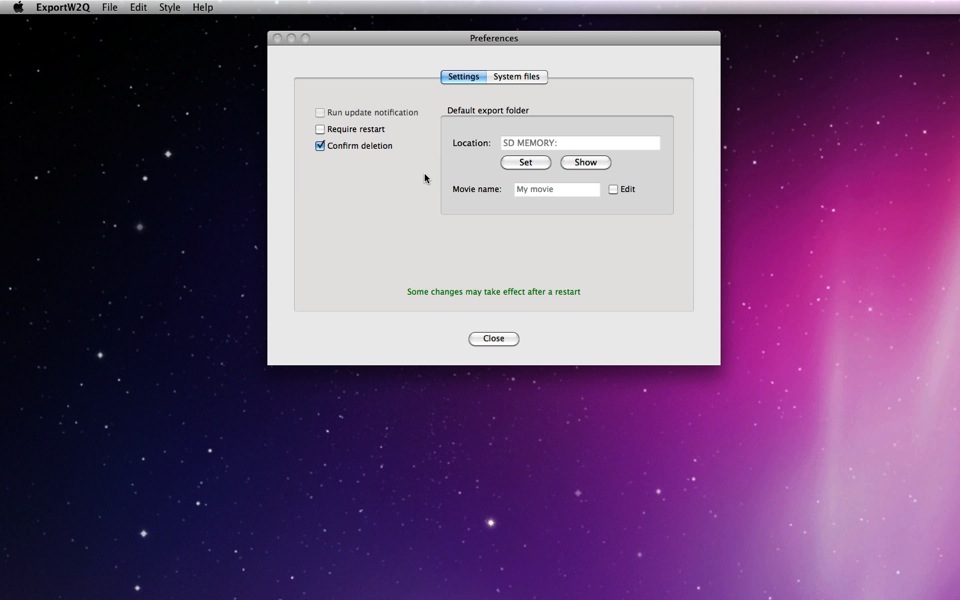
When you first launch any new application, it's always a good idea for you to open Preferences. Okay, why not? In order to open Preferences, choose Preferences under ExportW2Q. (See Screenshot 3-1.) The first tab is Settings. And you don't have many settings to work on. (See Screenshot 3-2.)
Furthermore, let's take a look at what we have inside the box that is labeled Default export folder. If you want the application to point to a specific folder or volume when you export movies, click on the Set button. By default, ExportW2Q will automatically set the export destination to Desktop. You can also set your own default movie file name. Click on the Edit checkbox and enter a name. Do not use a file extension.
If you know you are going to use the same group of export settings repeatedly, it may be a good idea if you just create an export preset. If you explore the drop-down menu at the top, you will see the export presets you have created. (See Screenshot 4-1.) If it doesn't open, then you have no export presets.
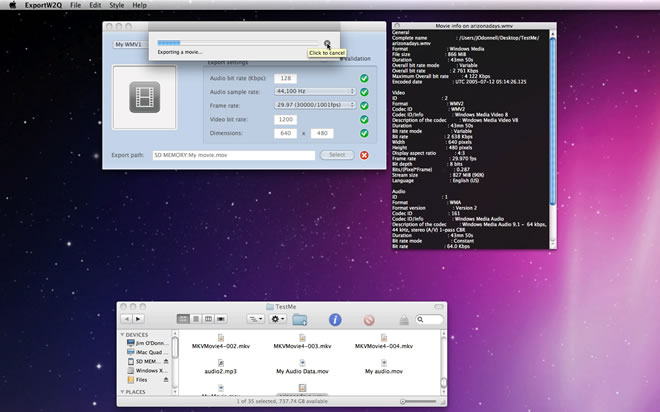
Before clicking on the Add button to create an export preset, choose Info under File. By opening Movie Info, you can work on export settings for a specific WMV video. As you see in Screenshot 4-3, drag and drop a movie onto the drop box. And the media window will open to the right. (See Screenshot 4-4.)
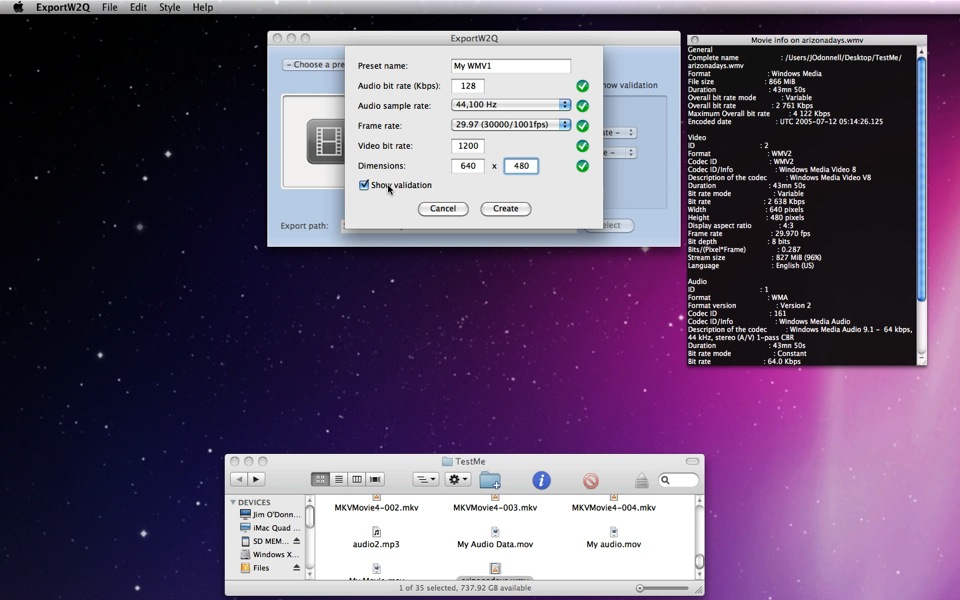
Now that Movie Info is open, click on the Add button to create a new export preset. (See Screenshot 4-4.) As you see in Screenshot 4-5, the export configuration is quite straightforward. In order to convert movies, ExportW2Q requires that you provide audio and video bit rates, audio sample rate, video frame rate and movie dimensions. If you don't know what to do with an audio bit rate, set it to 128 Kbps or higher. 192 Kbps is a common audio bit rate, too. As for the audio sample rate, 44.1 KHz and 48 KHz are common ones. As for the frame rate, you probably want to set it to 24 fps or higher. An appropriate video bit rate should depend on movie dimensions. For a movie size of 720 x 480 px, you probably want to set it to 900 Kbps to 1,200.
Note that the Create button at the bottom is disabled when this window first opens. If any of the export requirements goes missing, ExportW2Q will disable the button in real time. In order to see which requirement is missing, click on the Show validation checkbox. (See Screenshot 4-6.)
|