| MacHouse Software |
Last updated: June 03, 2011
|
| FontsView - User's Guide |
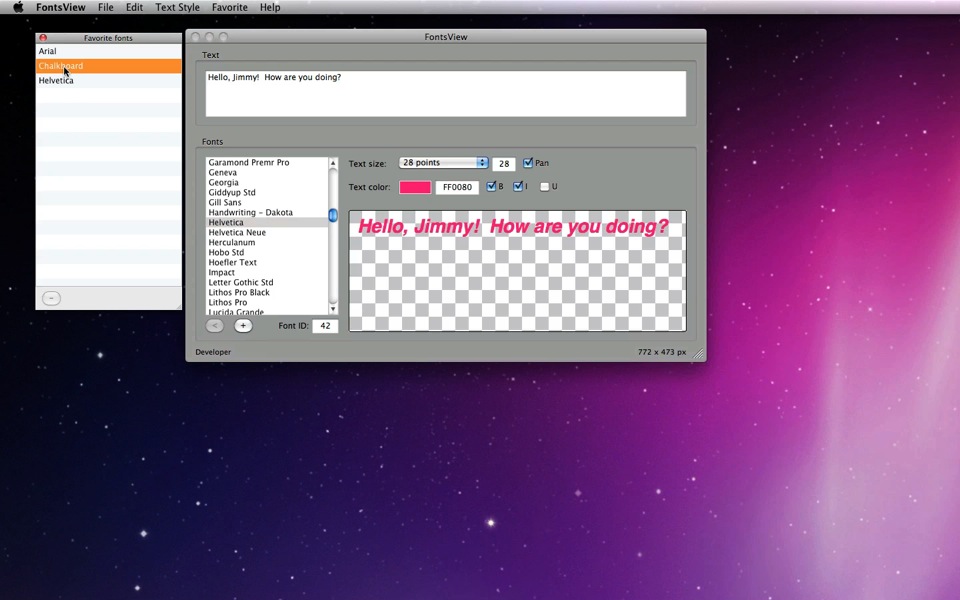
Let's quickly go over the main window. At the top, you have a text field. (See Screenshot 4-01.) You need at least one letter in this field to see what text style the selected font will produce. Moving to the second box, you have a listbox to the left, showing all fonts you have. Simply select one in the list. And FontsView will apply it to text along with a text color and a text size and then show the result to the display window. Furthermore, there are four checkboxes. B, I, U stand for Bold, Italic, Underline, respectively. Enable Pan if you want, and the Mouse pointer will transform itself into Open Hand, and you will be able to grab text and freely move within the display window. Furthermore, you can grab the bottom-right corner to resize the window. And FontsView will remember window dimensions. So when you launch it next time, FontsView will open at these dimensions.
Moveover, find a couple of buttons at the bottom of the window. Clicking on the button to the left will let the application open the Favorite window. You can also choose Favorite > Show Favorite or Close Favorite to show/hide this window. Favorite will give you quick access to selected fonts among dozens or hundreds of fonts you have in the list. In order to add a font to the favorite list, simply select one in the list and click on the + button. (See Screenshot 4-02.) You can also choose Favorite > Add Font to Favorite for the same purpose.
If you have more than a hundreds fonts to choose from, it'll be difficult even to locate the one that you know you want in the list. Screenshot 4-03 shows that the user has three favorite fonts. By clicking on 'Chalkboard,' FontsView would immediately locate it in the list and then apply it to text, showing the result to the display window accordingly. (See Screenshot 4-04.)
With the Pan checkbox enabled, you can reposition text within the display window. But it's not always easy to grab and relocate text. Text can go to a position where it'll be difficult to grab. (See Screenshot 4-05.) You can expand the window and find it. Or choose Text Style > Move Text To Default to move text back to the original position. (See Screenshot 4-06.)
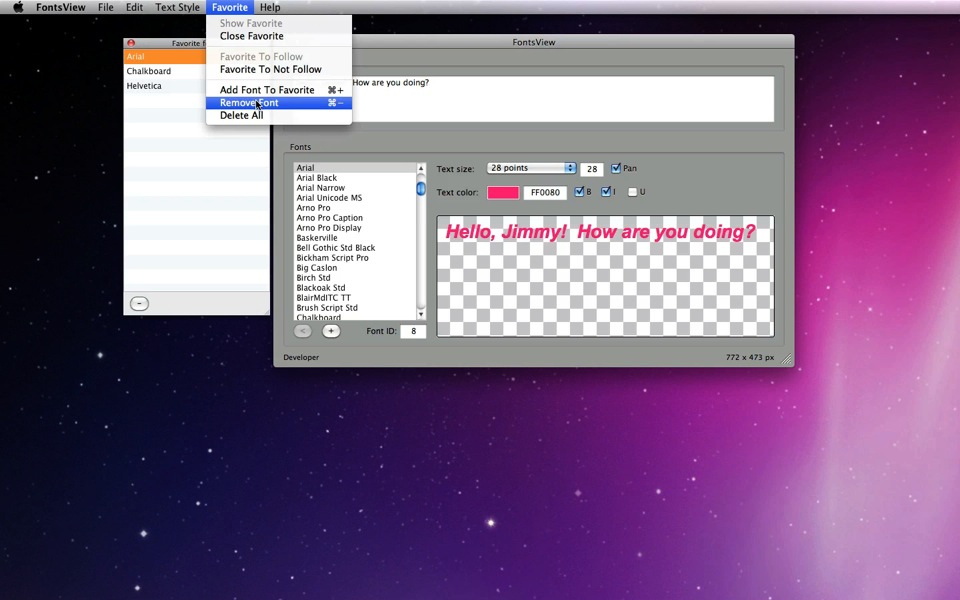
If you want to remove any of the fonts in the Favorite list, simply choose one from the list. Then click on the button at the bottom of the window. You can also choose Favorite > Remove Font (See Screenshot 4-07.) or press Command plus -. If you have 'Confirm deletion' enabled in Preferences, you will be prompted for confirmation. (See Screenshot 4-08.) If not, the selected favorite font will be removed accordingly without confirmation. Similarly, choose Favorite > Delete All to delete all favorite fonts in the favorite list.
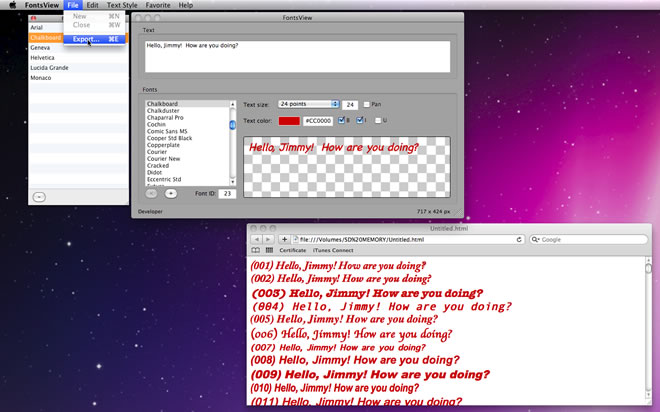
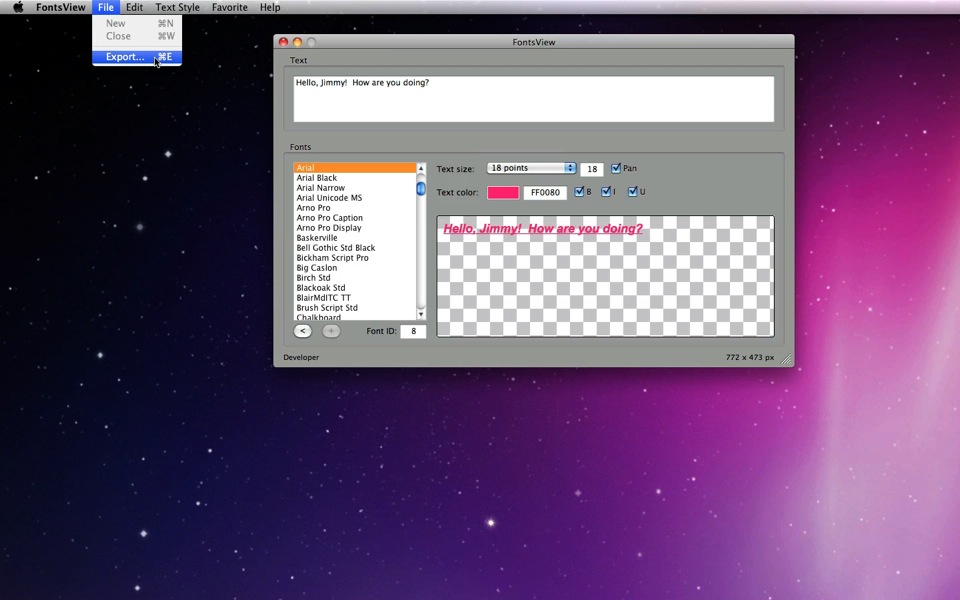
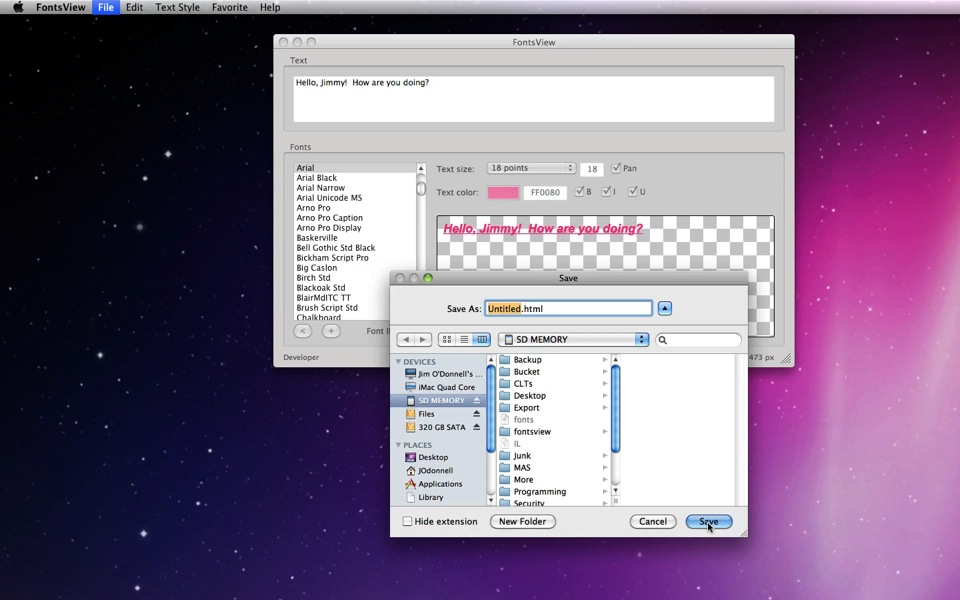
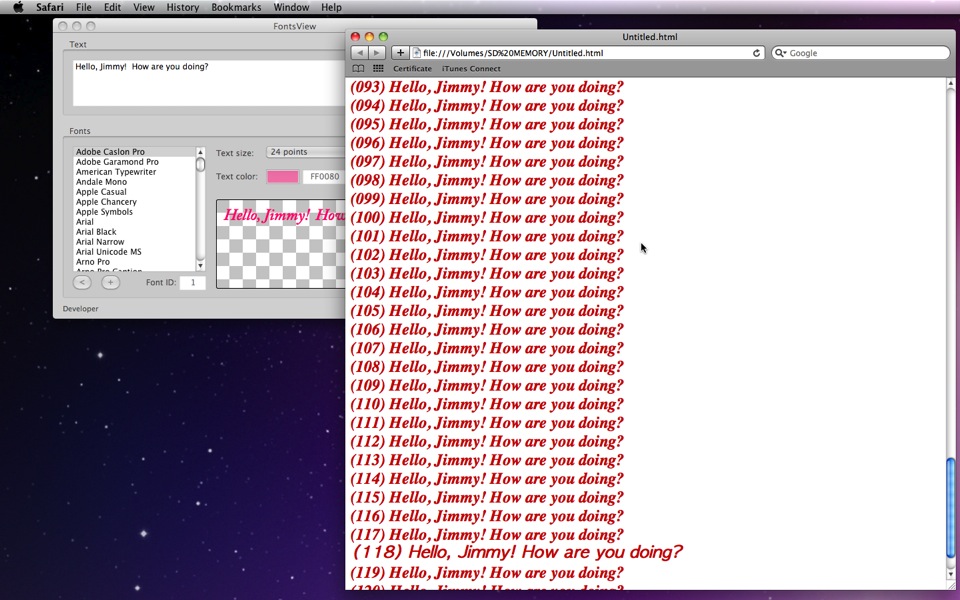
FontsView offers a great way of comparing text in different fonts. By choosing File > Export (See Screenshot 4-09.), you can generate an HTML file showing text in different fonts with the text color and text size of your choice. Export will remain disabled without a letter of text in the text field. Anyway, when you choose Export, you'll be prompted to name a file. The file extension must be HTML. Name a file and click on Save. (See Screenshot 4-10.) If you have just one or two hundred fonts, it'll take FontsView only a second or less to generate an HTML file. When the export process is done, you will hear a short, keen audio sound. You can open this file with web browsers like Safari (See Screenshot 4-11.), Camino or text editors like TextEdits and Microsoft Word (never tested with MS Word). An advantage of using TextEdit over web browsers is that you can open the Fonts window (Command + T) to see the exact font and style for a selection of text.
Looking at an HTML font file, notice that each line is preceeded with an enclosed number. It's a font ID. All fonts in the font list is numbered with the top one being 1. See the number field at the bottom of the application window to find the font ID of the selected font in the list. (See Screenshot 4-12.) Since each line is numbered, you can always go back to the font list to find which font has produced the font style on a particular line. There is no gurantee that your web browser or text editor will recongize all fonts. Screenshot 4-12 shows a number of lines with the same text style, indicating that the same font is applied to them. If the application cannot idenfity a font, it will likely to show text with its default font like Times.
|